
Soups & Stews
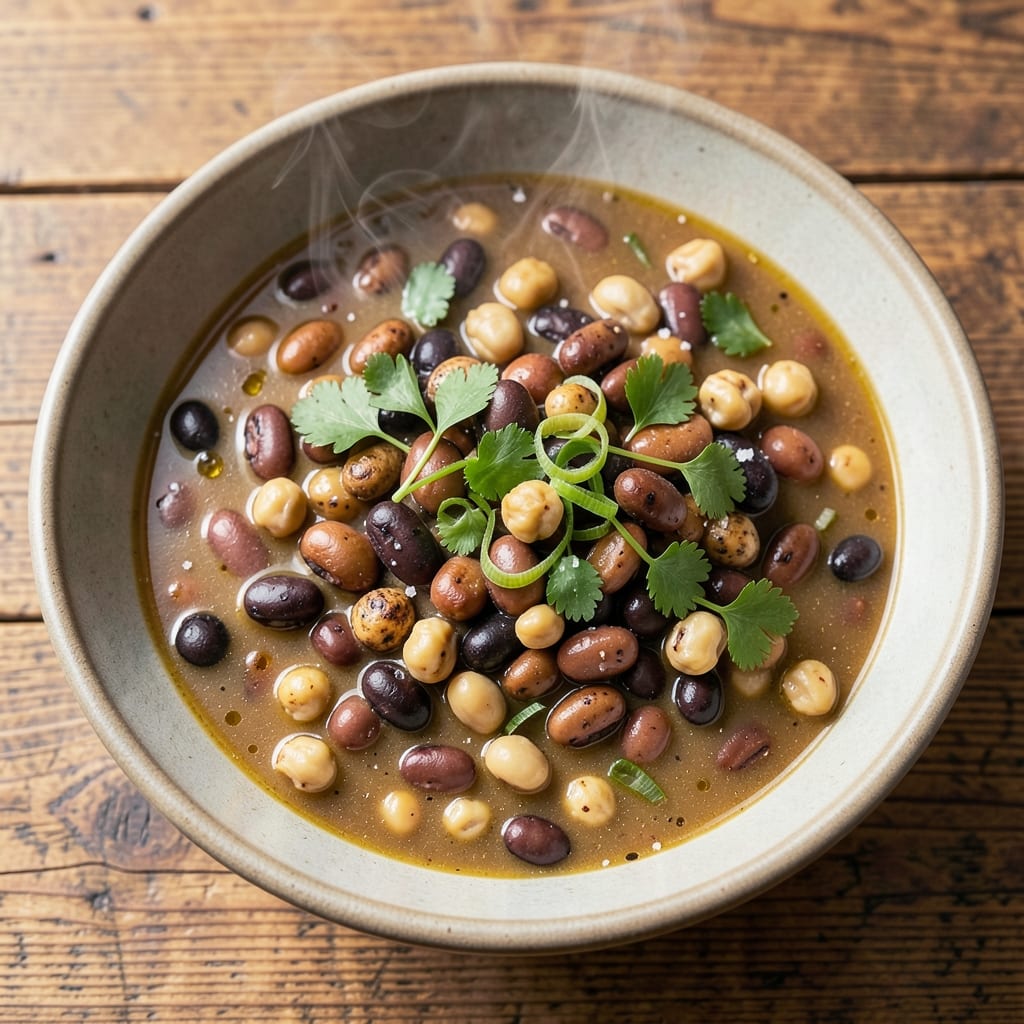
This 10 bean soup recipe transforms a pressure cooker into your secret weapon for hearty, vegetarian comfort food in just 30 minutes. The magic happens when ten different beans—from navy to kidney—simmer together with aromatic vegetables and herbs, creating a rich, deeply flavorful broth that tastes like it’s been cooking all day. What makes this recipe special is how it harnesses the pressure cooker’s power to deliver restaurant-quality results without hours of simmering.
The beauty of this dish lies in its simplicity: no fancy techniques required, just a few pantry staples and a little patience. The beans soften perfectly while absorbing the savory flavors of onions, garlic, and bay leaves, resulting in a soup that’s both satisfying and nutritious. It’s the kind of meal that feels indulgent yet wholesome, perfect for potlucks, family dinners, or cozy weeknight suppers when you crave something substantial.
By the time you’re done, you’ll have a steaming bowl of soup packed with tender beans, vibrant vegetables, and a broth so flavorful it’ll have everyone asking for seconds. The texture is just right—creamy from the beans, hearty from the vegetables, and aromatic from the herbs. Serve it with crusty bread or a simple green salad to round out the meal, and you’ve got a complete, comforting dinner that’s ready in a fraction of the time traditional recipes take.
This recipe is also incredibly versatile—adjust the liquid slightly for high-altitude cooking, or swap in additional vegetables like carrots or celery if you have them on hand. The pressure cooker ensures the beans are perfectly tender while keeping the broth rich and flavorful, making it a foolproof method for anyone looking to elevate their soup game. Let’s get cooking!
Ingredients for 10 bean soup recipe pressure cooker
Ten beans, one pot, pressure cooker magic—here’s what brings this hearty vegetarian soup to life.
| Ingredient | Amount | Notes |
|---|---|---|
| Dried Navy Beans 🌾 | 1 cup | Rinsed before cooking |
| Dried Black Beans 🌾 | 1 cup | Rinsed before cooking |
| Dried Kidney Beans 🌾 | 1 cup | Rinsed before cooking |
| Dried Pinto Beans 🌾 | 1 cup | Rinsed before cooking |
| Dried Great Northern Beans 🌾 | 1 cup | Rinsed before cooking |
| Dried Chickpeas 🌾 | ½ cup | Rinsed before cooking |
| Dried Lentils 🌾 | ½ cup | Green or brown preferred |
| Yellow Onions 🧅 | 2 whole | Diced, medium size |
| Carrots 🥕 | 3 medium | Peeled, chopped into chunks |
| Celery Stalks 🧄 | 3 whole | Chopped, including leaves |
| Garlic Cloves 🧄 | 4 cloves | Minced, fresh preferred |
| Vegetable Broth 💧 | 6 cups | Low-sodium preferred |
| Tomato Paste 🍅 | ½ cup | Squeeze tube or canned |
| Bay Leaves 🌿 | 2 whole | Fresh or dried |
| Dried Thyme 🌿 | 1 tsp | Or 1 tbsp fresh |
| Dried Oregano 🌿 | 1 tsp | Mexican oregano preferred |
| Salt 🧂 | 1 ½ tsp | Diamond Crystal preferred |
| Black Peppercorns 🌶️ | ½ tsp | Freshly ground |
| Olive Oil 🫒 | 2 tbsp | Extra-virgin for richness |
The beans are the stars, so don’t skimp on variety. Trader Joe’s and Whole Foods carry bulk bins where you can mix and match—just make sure they’re organic if possible. The navy, black, and kidney beans add the most texture, while lentils and chickpeas bring creaminess. Rinse them well before adding to the pot to remove any dust or debris. For the vegetables, fresh is best, but frozen carrots and celery work in a pinch. I always chop my celery with the leaves included—they pack extra flavor. The garlic? Freshly minced makes all the difference, but jarred works if you’re in a hurry.
No vegetable broth? Water plus 1 tbsp soy sauce gets you close, though the flavor won’t be as deep. Short on tomato paste? Canned diced tomatoes at half the amount work, but you’ll lose some of that rich, concentrated flavor. The herbs can be swapped—dried thyme and oregano are classic, but Italian seasoning blends work too. For the salt, Diamond Crystal dissolves more easily than table salt, so use it if you’ve got it. The olive oil might seem like a small detail, but using extra-virgin adds a fruity depth that cuts through the earthiness of the beans.
This soup tastes even better the next day, so make a double batch if you can. Store it in airtight containers in the fridge for up to 5 days, or freeze portions for 3 months. The pressure cooker makes leftovers a breeze—just reheat with a splash of water or broth. For serving, I like to garnish with a drizzle of olive oil and a sprinkle of fresh parsley, but whatever you’ve got works. The beans will soften more if reheated, so keep that in mind if you’re serving it to guests who prefer them firmer.
Why You'll Love This Recipe
- I’ll be real: the pressure cooker handles those dried beans like magic. No overnight soaking, no mushy textures—just toss them in raw, add water, and let it do the work. Honestly, I’ve made this on days I forgot to prep ahead, and it still comes out tender and perfect.
- No-Soak Necessary: I’ll be real: the pressure cooker handles those dried beans like magic. No overnight soaking, no mushy textures—just toss them in raw, add water, and let it do the work. Honestly, I’ve made this on days I forgot to prep ahead, and it still comes out tender and perfect.
- Earthy Depth Bomb: That mix of navy, black, and kidney beans? It’s like a flavor party in your bowl. The pinto beans add creaminess, while the Great Northerns bring a subtle nuttiness—plus, the pressure cooker locks in all that rich, slow-simmered taste without the wait. (Yes, even on a Tuesday night.)
- Lunchbox Hero: This soup reheats like a dream, making it my go-to for meal prep. I’ll make a big batch on Sunday, and by Friday, I’m still pulling jars from the fridge for lunches. Between us, it’s the only soup my picky teen won’t complain about—though he’ll still pick out the kidney beans.
Step-by-step instructions for pressure-cooker 10 bean soup
Here's how to transform dried beans into a hearty, flavorful soup in record time.
Prepare the Beans and Aromatics
Start by rinsing all the dried beans thoroughly under cold water in a colander. This removes any dust or debris and prevents the soup from becoming cloudy. I like to spread them on a clean kitchen towel and shake gently to remove excess moisture before transferring them to the pressure cooker.
While the beans drain, dice the 2 whole yellow onions into small, even pieces. Peel and chop the 3 medium carrots into ½-inch chunks and cut the 3 whole celery stalks into ½-inch pieces, including the leafy tops. Mince the 4 cloves garlic finely - you'll want them to dissolve completely into the soup. Keep all your chopped vegetables in separate bowls to stay organized.
Sauté the Vegetables and Build Flavor
Set your pressure cooker to the "Sauté" function and add the 2 tablespoons olive oil. Once the oil shimmers (about 1 minute), add the onions and cook for 3-4 minutes until they begin to soften and turn translucent. This is where the magic happens - the onions form the flavor base.
Add the carrots, celery, and garlic to the pot, stirring frequently for 4-5 minutes until the vegetables soften and the garlic becomes fragrant. Here's the thing - don't let the garlic burn. If it starts to darken, reduce the heat slightly. The vegetables should be tender but not mushy at this stage.
Add Liquids and Seasonings
Pour in the 6 cups vegetable broth and stir to combine with the sautéed vegetables. Add the ½ cup tomato paste, stirring until fully dissolved. The soup will look thick initially, but don't worry - it will thin out as it cooks.
Add all the rinsed beans, 2 whole bay leaves, 1 teaspoon dried thyme, 1 teaspoon dried oregano, 1½ teaspoons salt, and ½ teaspoon black peppercorns. Give everything a good stir to distribute the seasonings evenly throughout the mixture. The beans should be completely submerged in the liquid.
Pressure Cook to Perfection
Secure the lid on your pressure cooker and set it to cook on high pressure for 15 minutes. This is where the beans transform from dried to tender. After the cooking time elapses, allow the pressure to release naturally for 10 minutes before quick-releasing any remaining pressure.
Once the pressure is fully released, carefully remove the lid. The beans should be tender but still hold their shape. If you find any beans that are still firm, you can pressure cook them for an additional 3-5 minutes. Taste the soup at this point - you might want to adjust the seasoning. I usually add a bit more salt or a splash of lemon juice if needed.
Finish and Serve
Using an immersion blender or regular blender, puree about half of the soup until smooth. This creates a rich, velvety texture that balances the hearty beans. Return the pureed portion to the pot and stir well. The soup should be thick but still spoonable.
Let the soup sit for 5 minutes off the heat before serving. This allows the flavors to meld together perfectly. Ladle into bowls and garnish with fresh parsley if you like. Each spoonful delivers a symphony of textures and flavors - creamy pureed portions balanced with tender beans and aromatic vegetables.
Pro Tips For Making 10 Bean Soup Recipe Pressure Cooker
- Sort Beans by Soak Time: I learned this the hard way—kidney and black beans need a longer soak (8+ hours or overnight), while navy and Great Northern can handle a quick 2-hour soak in hot water. Drain and rinse all beans before adding to the pot, or you’ll end up with a gritty, uneven texture—no one wants that in their pressure-cooker magic.
- Skip the Crowding: Pressure cookers hate a packed pot. Aim for a 2-inch headspace above the beans after they’re hydrated, or you’ll trigger false pressure readings and undercooked beans. Navy and pinto beans expand the most—measure them soaked, then adjust other beans to fit without stacking like cordwood.
- Salt Late: Adding salt early turns your beans into rubbery bricks. Wait until the pressure cooker’s done its cycle, then stir in salt (about 1½ teaspoons per cup of beans) and let the soup sit off-heat for 10 minutes. This keeps them tender and lets flavors meld—trust me, your taste buds will notice.
- Roast the Aromatics: Toss diced onion, garlic, and celery in 1 tablespoon oil, then roast at 400°F for 15 minutes before adding to the pot. The caramelized bits add depth without extra effort—it’s the shortcut that actually changes the outcome. (Yes, even if you’re impatient like me.)
Regional styles of this recipe
Southern Comfort Style
In the American South, this soup gets a smoky twist by adding ½ cup smoked paprika and 1 smoked sausage (like kielbasa) during the sauté step. I like to brown the sausage first, then remove it and crumble it over the finished soup. The smoky depth pairs perfectly with the beans, and it’s a great way to add protein without sacrificing the vegetarian heart. Serve with cornbread for the full Southern experience. 🔥
Mexican-Inspired Frijoles
For a Mexican-inspired version, swap the thyme and oregano for 1 tablespoon ground cumin and 1 teaspoon chili powder. Add 1 diced jalapeño and 1 cup diced tomatoes with the broth, and finish with ½ cup chopped cilantro and a squeeze of lime. This version is lighter but packed with zesty, earthy flavors that work beautifully with tortillas or rice. 🌶️
Italian-Influenced Minestrone
Transform this soup into an Italian-inspired minestrone by adding 1 cup diced zucchini, 1 cup chopped spinach, and ½ cup diced pancetta or Italian sausage (optional for a meaty version). Stir in 1 teaspoon Italian seasoning and a splash of white wine when sautéing the onions. The result is a lighter, fresher soup with a Mediterranean flair. Serve with crusty garlic bread. 🍝
German-Style Linsen Suppe
For a German-inspired twist, reduce the beans to 3 cups total (prioritizing lentils and kidney beans) and add 1 cup diced smoked bacon (or vegan bacon for a vegetarian option). Include 1 teaspoon caraway seeds and ½ cup sauerkraut for tangy depth. This version is heartier and more robust, perfect for chilly days. Pair with pretzels or dark rye bread. 🥨
Spicy Caribbean Twist
Bring a Caribbean flair by adding 1 tablespoon soy sauce, 1 teaspoon allspice, and ½ teaspoon Scotch bonnet pepper (adjust to taste). Stir in ½ cup coconut milk at the end for creaminess. The combination of sweet, spicy, and savory flavors makes this soup uniquely vibrant. Garnish with fresh cilantro and lime wedges for serving. 🌴
High-Altitude Adjustments
If you're cooking above 3,500 feet, reduce the broth by ½ cup and increase the cooking time by 3-5 minutes to prevent the beans from becoming mushy. The pressure cooker helps, but the thinner air can make liquids evaporate faster. Always check for doneness and adjust seasoning after cooking, as high-altitude areas can sometimes mute flavors. 🌡️
Nutrition facts
Frequently asked questions
Can I use canned beans instead of dried beans in this recipe?
Yes, but with adjustments! Use 2 (15 oz) cans of each bean type (totaling 10 cans) and reduce the cooking time to just 5 minutes on high pressure. Drain and rinse the canned beans first to remove excess sodium. The texture will be slightly softer than dried beans, but it works well for quick meals.
Why does my pressure cooker make the soup too thick?
This happens when the beans absorb too much liquid during cooking. To fix it, stir in ½ to 1 cup hot vegetable broth after pureeing. If you prefer chunkier soup, skip the pureeing step or blend only a portion. The key is to taste as you go—thick soups can always be thinned with liquid.
How do I make this soup spicier?
Add ½ to 1 teaspoon cayenne pepper or 1-2 chopped jalapeños with the broth. For smoky heat, stir in 1 tablespoon smoked paprika during the sauté step. Remember, you can always add more spice at the end, but you can't remove it! Adjust gradually to avoid overpowering the beans.
Can I prep this soup ahead of time for meal prep?
This soup tastes even better the next day. Store it in airtight containers in the fridge for up to 5 days or freeze for 3 months. When reheating, add 2-3 tablespoons water or broth per serving to restore thickness. The flavors meld beautifully overnight.
What if I don't have an immersion blender?
No problem! Transfer about half the soup to a regular blender, blend until smooth, then return it to the pot. Work in batches if needed, and be careful with hot liquids. For extra creaminess, mash some beans with a fork before blending. The texture will still be delicious.