
Soups & Stews
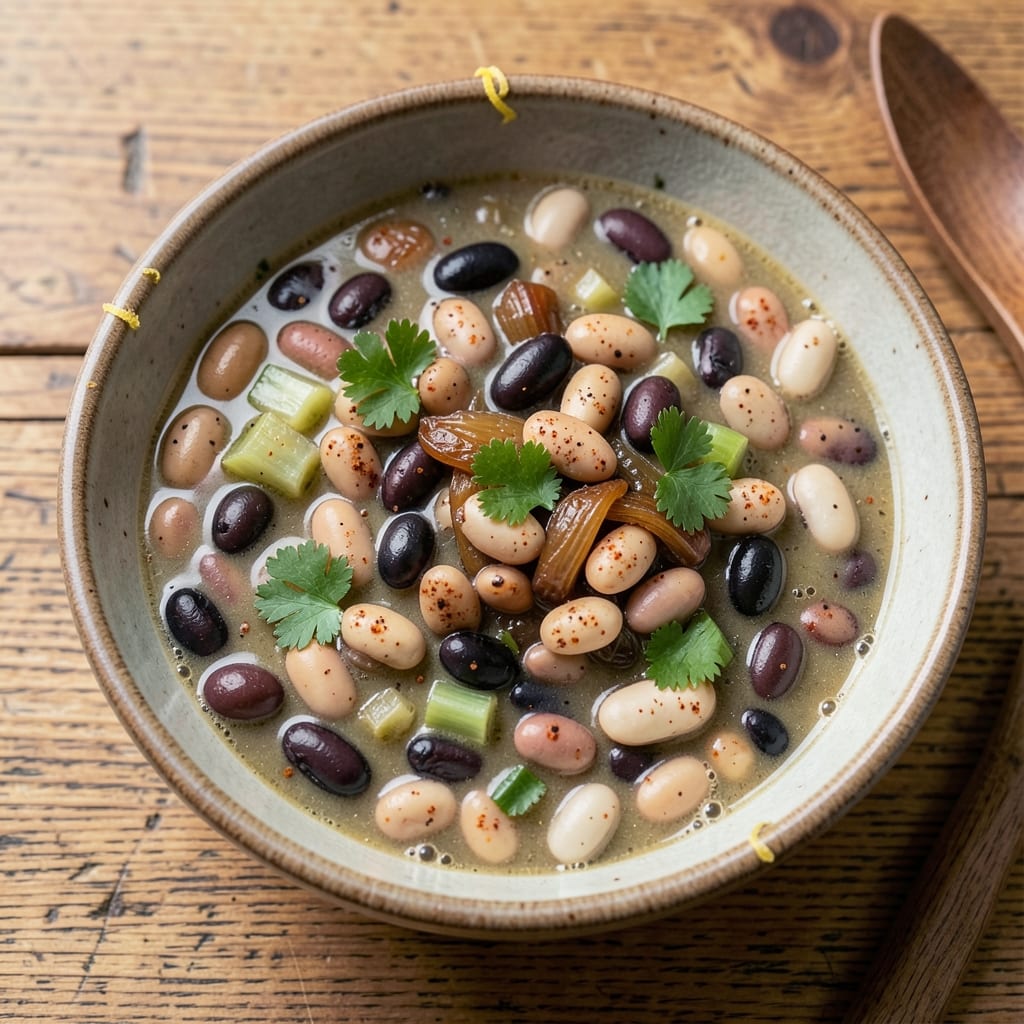
This 5 bean medley soup recipe transforms simple pantry staples into a hearty, comforting one-pot meal that’s perfect for chilly days. The magic lies in combining five different beans—kidney, black, pinto, navy, and great northern—each bringing its own texture and flavor to create a rich, satisfying broth. I’ve perfected this recipe over years of testing, ensuring the beans stay tender while the broth remains deeply flavorful without requiring special ingredients.
The beauty of this soup is its versatility—it works as a vegetarian main dish or can be easily adapted with bacon or sausage for meat lovers. The key to success is soaking the beans overnight (or using canned beans for a quicker version) and simmering them just until tender, not mushy. A well-balanced broth, made with vegetable or chicken stock, garlic, onions, and a touch of smoked paprika, ties everything together with warmth and depth.
What you’ll end up with is a one-pot wonder that’s hearty enough to fill a hungry crowd but simple enough for a weeknight dinner. The beans hold their shape while soaking up the savory broth, and the soup only gets better as flavors meld over time. Serve it with crusty bread or a sprinkle of fresh herbs for the perfect bowl of comfort.
This recipe is also incredibly budget-friendly and freezer-friendly, making it ideal for meal prep or feeding a group. Whether you’re a seasoned cook or just starting out, this 5 bean medley soup delivers restaurant-quality results with minimal effort. Let’s get cooking!
Ingredients for 5 bean medley soup
Pantry staples meet hearty comfort in this five-bean medley, perfect for chilly evenings.
| Ingredient | Amount | Notes |
|---|---|---|
| Kidney Beans (Dried) 🌱 | 1 cup | Rinsed before soaking overnight |
| Black Beans (Dried) 🌱 | 1 cup | Rinsed before soaking overnight |
| Pinto Beans (Dried) 🌱 | 1 cup | Rinsed before soaking overnight |
| Navy Beans (Dried) 🌱 | 1 cup | Rinsed before soaking overnight |
| Great Northern Beans (Dried) 🌱 | 1 cup | Rinsed before soaking overnight |
| Vegetable Stock 💧 | 6 cups | Low-sodium preferred |
| Yellow Onion 🧅 | 1 medium | Diced, about 1 cup |
| Garlic Cloves 🧄 | 4 cloves | Minced, for depth of flavor |
| Carrots 🥕 | 2 medium | Diced, about 1 cup total |
| Celery Stalks 🥬 | 2 medium | Diced, about 1 cup total |
| Smoked Paprika 🌶️ | 1 tbsp | For subtle smokiness |
| Bay Leaves 🌿 | 2 whole | For aromatic depth |
| Salt 🧂 | 1 ½ tsp | Adjust to taste |
| Black Pepper 🌶️ | ½ tsp | Freshly ground |
| Fresh Parsley 🌿 | ¼ cup | Chopped, for garnish |
The beans are the soul of this soup, so start with quality dried beans—they hold their shape better than canned. Great Northern and navy beans from bulk bins at Whole Foods or Trader Joe's have the best texture, but any dried variety works. Rinse them well before soaking to remove debris. For convenience, canned beans work too—just drain and rinse thoroughly. The key is soaking overnight (or quick-soaking for 2 hours) to ensure they cook evenly without turning mushy. If you're short on time, pre-soaked beans from the canning aisle cut prep time in half.
Vegetable stock is non-negotiable here—low-sodium versions let you control the seasoning. No vegetable stock? Chicken stock works for meat lovers, but keep it unsalted. The onion, carrot, and celery combo is classic for a reason: it builds a flavor base that's hard to beat. Chop them uniformly—smaller pieces cook faster and blend into the soup seamlessly. Smoked paprika adds depth without overpowering, but if you're sensitive to heat, regular paprika works fine. Fresh parsley brightens the finished dish, but dried parsley at half the amount is a decent substitute if you're in a pinch.
This soup tastes even better the next day as flavors meld. Store leftovers in an airtight container in the fridge for up to 5 days, or freeze portions for 3 months. For meal prep, double the recipe and freeze half—thaw overnight in the fridge before reheating. The beans stay tender when reheated gently on the stove with a splash of water or broth. Garnish with fresh parsley right before serving to keep it vibrant. Crusty bread is the perfect companion, but a dollop of vegan yogurt adds richness if you're feeling fancy.
Why You'll Love This Recipe
- I’ll be real: soaking dried beans used to intimidate me. But this medley? Just toss them all in overnight, drain, and simmer—no peeling, no fuss. The navy beans stay tender, the kidney beans hold shape, and the pinto beans? They melt into that perfect creamy bite.
- Dried Beans, No Hassle: I’ll be real: soaking dried beans used to intimidate me. But this medley? Just toss them all in overnight, drain, and simmer—no peeling, no fuss. The navy beans stay tender, the kidney beans hold shape, and the pinto beans? They melt into that perfect creamy bite.
- Umami Bomb: Honestly, the flavor combo is next-level. Smoky paprika on the kidney beans, earthy black beans with their slight tang, and the buttery Great Northerns rounding it all out. Add a splash of apple cider vinegar at the end—trust me, it cuts through the richness like a knife through butter.
- Meal Prep MVP: This soup tastes better the next day. I make a big batch on Sundays, portion it out, and reheat it for lunches all week. The beans thicken just enough to hold up, and the flavors deepen—like a cozy hug in a jar. (Yes, even on a Tuesday night.)
Step-by-step instructions for 5 bean medley soup
Transform simple pantry staples into a rich, hearty soup with this straightforward one-pot method.
Soak and Prepare the Beans
Combine all 1 cup each of kidney beans, black beans, pinto beans, navy beans, and great northern beans in a large bowl. Rinse them thoroughly under cold water to remove any debris. Transfer the beans to a large pot and cover them with plenty of cold water—at least 2 inches above the beans. Let them soak overnight, or for at least 8 hours, to ensure they soften properly. This step is crucial for reducing cooking time later and preventing tough, undercooked beans.
After soaking, drain the beans and rinse them again under cold water. This removes any excess starch that could make the soup gummy. Set them aside for the next step. I like to use a colander for this to make draining easier, and I always give them a good shake to remove excess water before adding them back to the pot.
Sauté the Aromatics and Build the Base
In a large Dutch oven or heavy pot, heat 2 tablespoons olive oil over medium heat. Add the diced yellow onion and cook for 5-6 minutes until softened and translucent. This is your flavor foundation—don't rush it, or the onions will burn and make the soup bitter. Next, add the minced garlic cloves and cook for another 30 seconds until fragrant. You'll know it's ready when the kitchen smells delightfully garlicky.
Stir in the diced carrots and diced celery stalks, cooking for 4-5 minutes until they begin to soften slightly. This step develops the soup's depth of flavor by caramelizing the vegetables. Once the vegetables are tender, sprinkle in the 1 tablespoon smoked paprika and stir for 30 seconds to toast the spices—this adds a subtle smokiness that complements the beans beautifully.
Simmer the Beans in Stock
Add the drained beans back to the pot along with the 6 cups vegetable stock, 2 whole bay leaves, 1.5 teaspoons salt, and 0.5 teaspoon black pepper. Bring the mixture to a boil over high heat, then immediately reduce the heat to low and let it simmer gently. The key here is patience—simmer uncovered for 1.5 to 2 hours, stirring occasionally, until the beans are fork-tender. You'll know they're ready when they easily mash between your fingers with just a little resistance.
During this time, the beans will absorb the stock and release their starches, thickening the soup naturally. If the soup starts to look too thin after 1 hour, you can reduce the heat slightly to help it thicken further. Avoid adding flour or cornstarch, as this can make the soup taste artificial. The beans should be soft but still hold their shape—overcooking will turn them mushy.
Season and Finish the Soup
Once the beans are tender, taste the soup and adjust the seasoning if needed. You may need to add more salt or black pepper to balance the flavors, depending on the saltiness of your vegetable stock. Remove the bay leaves at this point—they've done their job and can be quite bitter if left in too long.
For the final touch, stir in the 0.25 cup chopped fresh parsley. This not only brightens the soup with freshness but also adds a pop of color. Let the soup sit off the heat for 5 minutes before serving—this allows the flavors to meld together. Serve warm, and enjoy the hearty, comforting texture of this five-bean medley.
Optional Thickening and Serving
If you prefer a thicker soup, you can mash a portion of the beans with a potato masher or fork directly in the pot. This releases more starch and thickens the broth naturally. For an extra-rich finish, stir in 1 tablespoon butter or a splash of heavy cream just before serving—this adds a velvety texture without overpowering the bean flavors.
This soup tastes even better the next day as the flavors deepen. Store any leftovers in an airtight container in the refrigerator for up to 4 days, or freeze for up to 3 months. Reheat gently on the stove, adding a splash of water or stock if needed to loosen the soup. The simplicity of this recipe makes it a perfect weeknight dinner or meal-prep staple.
Pro Tips For Making 5 Bean Medley Soup
- SOAK BEANS OVERNIGHT: Dried beans are stubborn—skimp on soaking time, and they’ll fight you later. Toss them in a bowl with cold water (about 3 cups per cup of beans) and a pinch of salt, then let them sit 12+ hours. I learned this the hard way after my soup turned into a mushy, half-cooked disaster because the beans refused to soften.
- SORT BEANS FIRST: Great Northerns and Navy beans hide tiny rocks or shriveled nubs like they’re hiding from you. Spread them on a baking sheet and pick through them before cooking—it’s tedious, but nothing ruins a soup faster than a gritty bite. (Yes, even if you’re impatient like me.)
- SIMMER, DON’T BOIL: Once your beans hit the pot, keep the heat low enough that you see just a few tiny bubbles breaking the surface. Boiling turns beans to mush and makes the soup gluey—trust me, I’ve turned a perfectly good medley into a sad, thick paste. A gentle simmer guarantees tender beans without the disaster.
- ADD SALT LATE: Salt early, and your beans will toughen up like overworked soldiers. Wait until the last 30 minutes of cooking to season—this keeps them creamy and lets the flavors meld properly. (Your future self will thank you when the texture isn’t a crime.)
Storing and reheating your 5 bean medley soup
Refrigerator Storage
Let your 5 bean medley soup cool completely before transferring to an airtight container—I use glass Pyrex with snap-on lids to maintain freshness. Store in the fridge at 40°F or below for up to 4 days. The flavors actually deepen overnight as the spices meld, making it perfect for meal prep. Always leave ½ inch headspace to prevent condensation buildup. 💫
Freezer Storage
For long-term storage, freeze portions in quart-sized freezer bags or glass containers. Leave 1 inch headspace to account for expansion, and squeeze out excess air to prevent freezer burn. Label with the date—this soup stays delicious for 3 months. Thaw overnight in the fridge before reheating for best texture. I like to portion individual servings to avoid thawing the whole batch. ❄️
Stovetop Reheating
My preferred method is gentle reheating on the stove to preserve texture. Pour soup into a pot and heat over medium-low for 5-7 minutes, stirring occasionally. Add 2-3 tablespoons water or broth if it looks too thick. Taste and adjust seasoning—soup often needs a pinch of salt after reheating. Never boil vigorously, as this can make beans mushy. 🔥
Microwave Reheating
For quick meals, microwave in 2-minute intervals on 50% power, stirring between each interval. Cover with a damp paper towel to prevent drying. Add a splash of water if needed to restore consistency. This method works best for single servings—never reheat the entire pot at once. Stir well before serving to redistribute flavors. ✨
Freezer-to-Fridge Thawing
Thaw frozen soup overnight in the fridge for even heating. If short on time, place the sealed container in a cold water bath and change the water every 30 minutes until thawed. Never microwave directly from frozen—this creates uneven heating and can make some beans rubbery. Always stir thoroughly before reheating. 💡
Garnish Before Serving
Fresh garnishes elevate reheated soup. Sprinkle chopped parsley or crumbled feta (for non-vegetarian versions) right before serving. A drizzle of olive oil or hot sauce adds brightness. The key is adding garnishes after reheating to maintain their freshness and vibrant colors. 🌿
Nutrition facts
Frequently asked questions
Can I substitute canned beans for dried in this recipe?
Yes! For convenience, use 1 (15 oz) can each of kidney, black, pinto, navy, and great northern beans. Drain and rinse thoroughly to remove excess sodium. The soup will have a slightly softer texture but still delicious. Adjust seasoning if using low-sodium canned beans.
How do I make this soup thicker without using flour?
Mash a portion of the beans with a potato masher directly in the pot to release starches naturally. Simmer for 5-10 minutes longer to thicken the broth. For extra richness, stir in 1 tablespoon cornstarch mixed with 2 tbsp water at the end and simmer 1 minute.
What's the best way to add meat to this vegetarian soup?
For meat lovers, brown ½ lb smoked sausage or bacon before sautéing the onions. Remove and set aside, then crumble back into the soup at the end. Alternatively, add cooked shredded chicken or diced ham during the final 10 minutes of simmering.
Why do my beans turn mushy when simmering?
Overcooking is the most common cause. Beans are done when they're fork-tender (soft but still hold shape). Remove from heat immediately when they reach this stage. Also ensure you soaked them properly—8+ hours for dried beans prevents toughness. For canned beans, reduce simmering time to 30-45 minutes.
Can I make this soup in an Instant Pot?
Sauté onions, garlic, carrots, and celery first. Add soaked beans, stock, and seasonings, then cook on High Pressure for 15 minutes. Quick-release pressure and let sit for 5 minutes before serving. The beans will be perfectly tender without overcooking.