
Soups & Stews
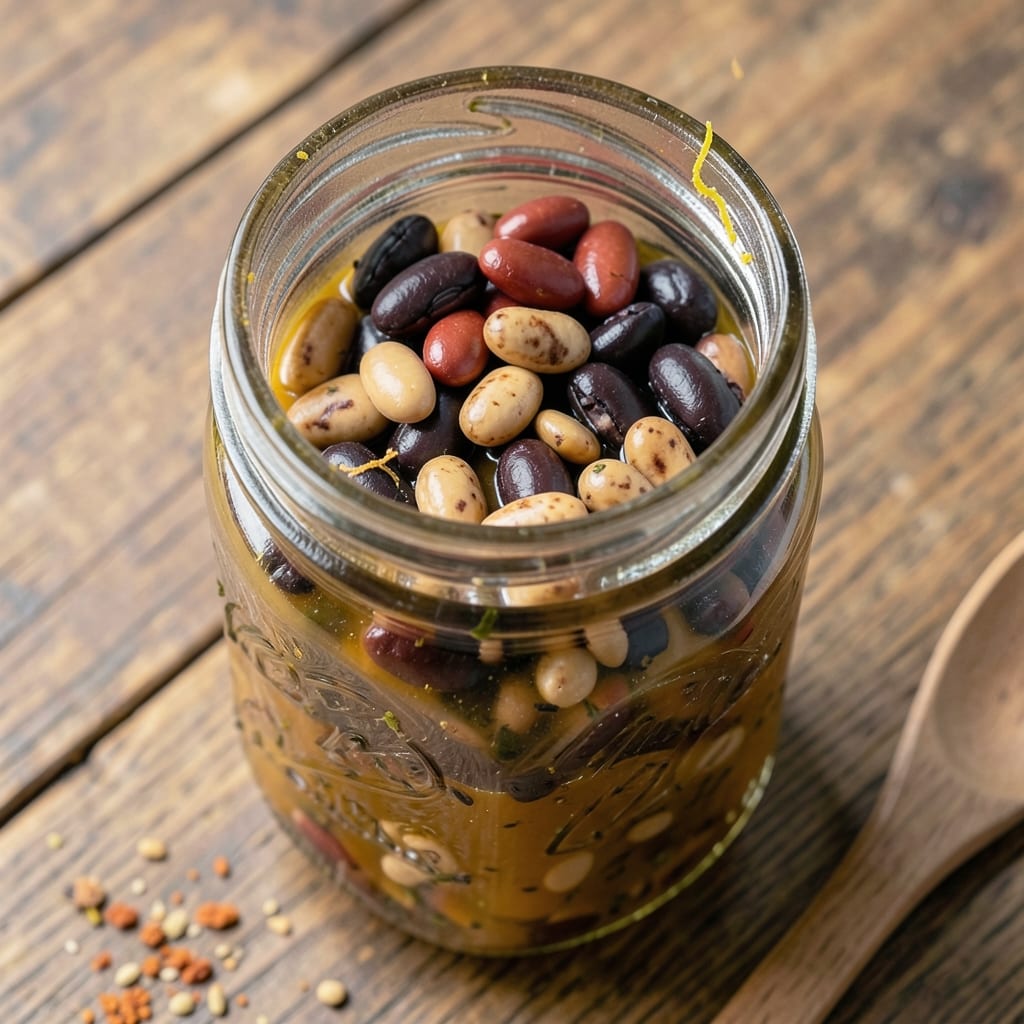
This 5 bean soup in a jar recipe transforms simple pantry staples into a hearty, flavorful meal that simmers effortlessly on the stove. The beauty lies in its simplicity—just dried beans, broth, and basic seasonings—yet the result is a rich, satisfying soup packed with texture and depth. I developed this method after realizing how much easier meal prep becomes when you can store the entire soup in jars, ready to heat and serve whenever needed.
The key to perfecting this soup is patience—soaking the beans overnight ensures they cook evenly and retain their shape, while slow simmering develops layers of flavor that canned versions lack. You'll end up with tender beans, aromatic vegetables, and a broth so rich it feels like a hug in a bowl. This recipe is vegetarian-friendly, budget-conscious, and perfect for meal prepping ahead of time.
What makes this version truly special is the no-fuss flavor—no complicated techniques, just a balanced blend of spices and herbs that come together in one pot. The soup keeps well in the fridge for up to a week, making it ideal for busy schedules, and the jars make portioning effortless. Whether you're feeding a family or prepping for the week, this soup delivers comfort with minimal effort.
Serve it with crusty bread or over rice for a complete meal, or enjoy it as-is with a sprinkle of fresh herbs. The beauty of this recipe is its versatility—it's just as satisfying for a quick lunch as it is for a cozy dinner. Let's get started on creating your pantry-staple heartiness in jars.
Ingredients for 5 bean soup in a jar
Pantry staples and dried beans—this hearty soup comes together in jars for easy meal prep.
| Ingredient | Amount | Notes |
|---|---|---|
| Dried Navy Beans 🌾 | 1 cup | Rinsed before soaking |
| Dried Kidney Beans 🌾 | 1 cup | Rinsed before soaking |
| Dried Black Beans 🌾 | 1 cup | Rinsed before soaking |
| Dried Pinto Beans 🌾 | 1 cup | Rinsed before soaking |
| Dried Great Northern Beans 🌾 | 1 cup | Rinsed before soaking |
| Vegetable Broth 💧 | 6 cups | Low-sodium preferred |
| Yellow Onion 🧅 | 1 whole | Diced into small pieces |
| Carrots 🥕 | 2 medium | Chopped into small chunks |
| Celery Stalks 🧆 | 2 whole | Diced into small pieces |
| Garlic Cloves 🧄 | 3 cloves | Minced for flavor |
| Tomato Paste 🍅 | ½ cup | Smooth texture preferred |
| Dried Thyme 🌿 | 1 tsp | Or 1 tbsp fresh thyme |
| Bay Leaves 🍃 | 2 whole | Remove before serving |
| Ground Black Pepper 🌶️ | ½ tsp | Freshly ground preferred |
| Salt 🧂 | 1 ½ tsp | Adjust to taste |
The beans are the star, so pick a mix of textures—navy and black for heartiness, kidney for color, pinto for earthiness. Bob's Red Mill or store-brand dried beans work perfectly. Soak them overnight in plenty of water (about 4 cups per cup of beans) to soften them up. The broth? Low-sodium is key—you'll be adding plenty of salt later. For the veggies, Trader Joe's has great pre-chopped carrots and celery if you're short on time, but fresh is always better. The onion and garlic? Pulse them in a food processor for even cooking—no one likes mushy onions in soup.
No dried thyme? Fresh works at three times the amount, but if you're in a pinch, a pinch of oregano gets you close. Short on tomato paste? Crushed tomatoes in a pinch—just add an extra pinch of sugar to balance the acidity. The bay leaves? Don't skip them—they add that deep, aromatic base. For the salt, I always taste as I go. Start with half the amount and adjust—this soup gets richer as it sits, so don't overdo it. The carrots can be baby carrots if that's what's in the fridge, but regular carrots hold up better during storage.
This soup tastes even better the next day—perfect for meal prep. Store in clean, sterilized jars with tight lids in the fridge for up to 5 days. For longer storage, freeze for up to 3 months. I like to portion it into quart jars—one jar per meal. When reheating, add a splash of water or broth to loosen it up. The flavors meld beautifully over time, so don't rush it. Leftovers? Double the batch—you'll want it.
Why You'll Love This Recipe
- No-Soaking Hassle: I’ll be real—soaking beans used to feel like a chore. This recipe skips it entirely. Just toss those dried Navy, kidney, and black beans into a jar with broth, let them sit overnight, and wake up to a pot ready to simmer. Twenty minutes later, you’ve got soup.
- Deep, Earthy Magic: Between us, the combo of smoky kidney beans, buttery Great Northerns, and that creamy pinto texture? It’s like a flavor party in your mouth. The slow simmer lets all those dried beans mellow into something rich—no weird mushy bits, just pure, satisfying depth.
- Jar-to-Pot Simplicity: Honestly, the prep is so easy it’s almost cheating. Dump the beans into a jar with broth, spices, and a splash of vinegar, then seal it tight. Toss it in the fridge overnight, and in the morning, you’re one slow cooker or stovetop simmer away from dinner. Minimal effort, maximum reward.
- Budget-Friendly Pantry Staple: This is my go-to when I’m broke or lazy—or both. A single jar of each bean feeds my family for days, and the flavors only get better as they sit. Freeze extras for months, toss them into salads, or just reheat with a sprinkle of cheese. It’s the ultimate money-saver that still feels special.
Step-by-step instructions for 5 bean soup in a jar
Here's how to turn pantry staples into a hearty, flavorful soup with minimal effort.
👨🍳 Step 1: Soak and Prepare the Beans
Combine all 1 cup dried navy beans, 1 cup dried kidney beans, 1 cup dried black beans, 1 cup dried pinto beans, and 1 cup dried great northern beans in a large bowl. Rinse them thoroughly under cold water to remove any debris. Transfer the beans to a clean jar with a tight-fitting lid—this will be your cooking vessel.
Cover the beans with cold water by about 2 inches above the top. Let them soak overnight, or at least for 8 hours, in the refrigerator. This long soak ensures they cook evenly and reduces cooking time later. The next day, drain and rinse the soaked beans before proceeding—this removes excess starch that can make the soup gummy.
🍳 Step 2: Sauté the Vegetable Base
In a separate pot, combine 6 cups vegetable broth, 1 whole yellow onion (diced), 2 medium carrots (chopped), 2 whole celery stalks (diced), 3 cloves garlic (minced), 0.5 cup tomato paste, 1 tsp dried thyme, 2 whole bay leaves, and 0.5 tsp ground black pepper. Bring the mixture to a boil over medium-high heat, then reduce to a simmer.
Let the broth and vegetables cook together for 15 minutes, stirring occasionally. This allows the flavors to meld and the vegetables to soften slightly. The mixture should smell rich and aromatic—like a warm hug in a pot. If the broth reduces too much, add a splash of water to maintain the proper consistency.
🥘 Step 3: Combine and Simmer the Soup
Add the drained soaked beans to the simmering broth and vegetable mixture. Stir gently to combine, ensuring the beans are fully submerged. Bring the soup back to a boil, then reduce the heat to low and let it simmer uncovered for 1 to 1.5 hours. This slow cooking breaks down the beans, creating a thick, hearty texture.
Check the beans periodically with a spoon—they're ready when they're tender but still hold their shape. You'll know it's done when the soup thickens slightly and the flavors deepen. If the soup gets too thick, stir in a little water to loosen it. The bay leaves can be removed before serving, as they're not meant to be eaten.
⏰ Step 4: Season and Adjust to Perfection
Taste the soup and adjust the seasoning with 1.5 tsp salt as needed. The beans should be fully tender, and the broth should be rich and flavorful. If the soup seems bland, a splash of lemon juice or a pinch of sugar can brighten the flavors. Let the soup sit off the heat for 10 minutes before serving—this allows the flavors to meld even more.
Ladle the soup into bowls and serve hot. The combination of textures—creamy beans, tender vegetables, and rich broth—makes this a satisfying meal. Store any leftovers in the jar for up to 5 days in the refrigerator, or freeze for longer storage. This soup is perfect for busy weeknights or meal prep—just heat and enjoy!
Pro Tips For Making 5 Bean Soup In A Jar
- SOAK BEANS SEPARATELY: Navy beans and Great Northerns need 8+ hours, while kidney and black beans handle 2 hours just fine. I learned this the hard way—mixing them all overnight leads to mushy navy beans and undercooked dark beans. Use two bowls, label them, and save yourself a sad, uneven soup.
- SORT BEFORE SIMMERING: Pick through dried beans for rocks, shriveled bits, or odd colors before cooking. I skip this sometimes, and one pebble later, I’m cursing the jar’s bottom. A quick 5-minute scan saves your teeth and keeps the texture consistent.
- LOW AND SLOW WINS: After the initial boil, drop heat to a bare simmer—think tiny bubbles, not rolling. I used to rush it, and the beans turned to paste. Two hours at low heat gives them time to soften without falling apart, especially those stubborn pinto beans.
- SALT AT THE END: Adding salt early toughens the beans, especially kidney and black ones. Wait until the last 15 minutes, then season generously. Trust me, your soup will taste richer without the chewy disappointment. (Yes, even if you’re impatient like me.)
Troubleshooting this dish
Mushy Beans Fix
If your beans turn out mushy, it’s usually from overcooking or insufficient soaking. Next time, reduce simmering time to 1 hour and check tenderness at 45 minutes. I’ve found Great Northern beans need the least cooking—remove them early if others are done. For extra insurance, soak beans in cold water with 1 tsp baking soda (rinse well before cooking) to soften them faster without overcooking. 🌱
Broth Too Thin?
Thin broth happens when beans release too much starch. Simmer uncovered for 10-15 extra minutes to evaporate excess liquid. For instant thickening, mash 1-2 cooked beans with a fork and stir back in. If you’re prepping ahead, reduce the broth by ½ cup before adding beans—they’ll absorb liquid as they cook. 💧
Soggy Vegetables
Vegetables lose texture when overcooked. Sauté onions, carrots, and celery in 1 tbsp olive oil for 5 minutes before adding broth to build flavor without softening. For celery, add it last (after beans are tender) to keep it crisp. I like Trader Joe’s frozen diced veggies—they hold up better during long simmers. 🥕
Flat Flavor Profile
Flat flavor usually means underseasoned broth or rushed cooking. Simmer uncovered for the full 1.5 hours—this lets flavors concentrate. Boost depth with 1 tsp smoked paprika or ½ tsp liquid smoke at the end. A splash of apple cider vinegar (1 tbsp) brightens flavors if the soup tastes dull. 🌶️
Jars Not Sealing?
Sterilize jars and lids by boiling for 10 minutes before filling. Leave ½-inch headspace—beans expand as they cook! If jars still don’t seal, process in a water bath for 90 minutes (adjust for altitude). For fridge storage, use airtight containers with lids. I swear by Ball Mason jars for this recipe. ❄️
Grainy Texture
Graininess comes from unsoaked beans or insufficient stirring. Always rinse soaked beans well to remove starch. Stir the soup every 15 minutes during simmering to distribute flavors evenly. For extra creaminess, blend ½ cup soup and stir it back in at the end. 🥄
Nutrition facts
Frequently asked questions
Can I use canned beans instead of dried for this jarred soup?
You can absolutely use canned beans, but the texture and flavor won't be the same. Canned beans are pre-cooked and softer, which can make your soup too thin and mushy. If you do use them, drain and rinse them well, then simmer the soup for only 30-45 minutes to avoid overcooking. For best results, stick with dried beans—they absorb flavors better and create that perfect hearty texture.
How do I adjust this recipe for a pressure cooker? Pressure cooking cuts down the time dramatically! After soaking the beans overnight, combine everything in your pressure cooker and cook on high pressure for 15 minutes. Let the pressure release naturally for 10 minutes before opening. The beans will be perfectly tender without overcooking the vegetables. Just
What's the best way to reheat this soup from the jar?
For the best texture, reheat gently on the stovetop over medium-low heat. Add ¼ cup water or broth to loosen the soup if it's too thick. Stir frequently to prevent sticking. If using a microwave, transfer to a microwave-safe bowl, cover, and heat in 1-minute intervals, stirring between each. Never reheat to boiling—just until steaming hot throughout.
Can I add meat to this vegetarian soup?
While this recipe is designed to be vegetarian, you can easily add meat if desired. Brown ½ lb ground pork or Italian sausage first, then drain the fat before adding to the soup. For a lighter option, try diced ham or shredded chicken. Just reduce the broth by ½ cup to maintain the right consistency. The meat will absorb flavors beautifully during the long simmer.
How do I make this soup spicier?
For extra heat, add ½ tsp cayenne pepper or 1 tbsp hot sauce at the end of cooking. For depth, include 1 chipotle pepper in adobo sauce with the tomato paste. If you like smoky flavors, add ½ tsp smoked paprika along with the thyme. Always taste first—you can add more heat but can't remove it once it's in!