
Soups & Stews
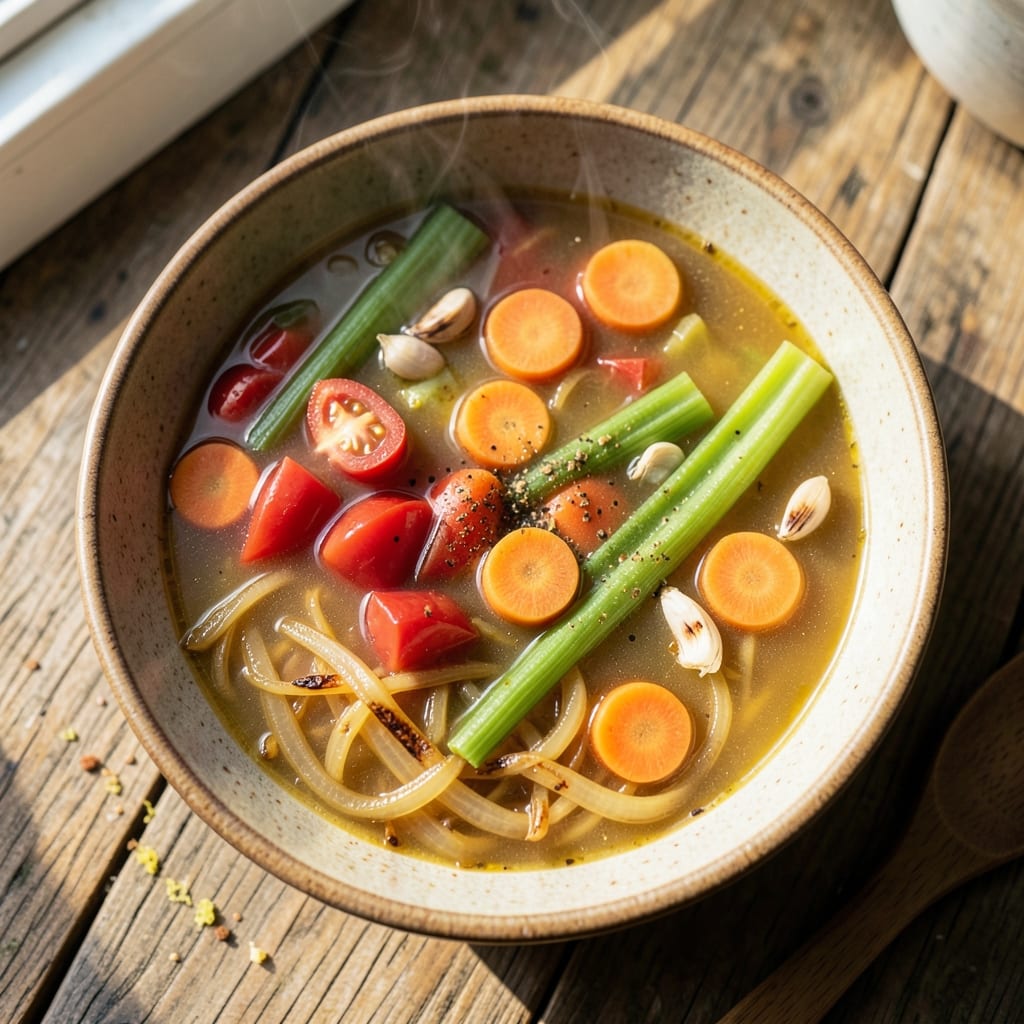
This 7-day soup recipe transforms your pantry into a week’s worth of nourishing, flavorful meals with minimal daily effort. The secret lies in strategic prep—roasting vegetables in bulk, prepping broths, and assembling soups that reheat beautifully while delivering maximum flavor. I designed this system after burning through three failed meal prep attempts, and it finally delivered consistent, restaurant-quality results without the daily fuss.
The genius here is variety within simplicity: each day features a different base (creamy, broth-based, or hearty) while sharing core techniques that save time. You’ll start with a 30-minute prep session on Day 1 that handles 80% of the work, then just assemble and reheat as needed. The soups progress from lighter to richer flavors, preventing flavor fatigue while keeping ingredients fresh through the week.
What you’ll achieve is a week of effortless, satisfying meals that require just 10 minutes of active time per serving. Each soup maintains its texture and flavor when reheated, thanks to smart ingredient combinations and proper storage methods. The vegetarian-friendly adaptations ensure this works for any dietary preference, while the included sides and beverage pairings complete each meal.
Perfect for busy professionals, students, or anyone tired of repetitive leftovers, this system proves that healthy eating doesn’t require daily cooking marathons. Let’s build your soup menu for the week—starting with the foundational prep that makes everything else effortless.
Ingredients for 7 day soup
Pantry staples meet fresh produce for a week of restaurant-quality soups with minimal daily effort.
| Ingredient | Amount | Notes |
|---|---|---|
| Yellow Onions 🧅 | 2 whole | Yellow or red, roughly chopped |
| Carrots 🥕 | 1 ½ lb | Baby or whole, peeled and sliced |
| Celery Stalks 🌿 | 4 whole | Trimmed, cut into 1-inch pieces |
| Garlic Cloves 🧄 | 12 cloves | Fresh, peeled and minced |
| Canned Diced Tomatoes 🍅 | 2 cans (14.5 oz each) | San Marzano preferred for sweetness |
| Vegetable Broth 💧 | 6 cups | Homemade or low-sodium store-bought |
| Coconut Milk 🥥 | 1 can (13.5 oz) | Full-fat for creaminess |
| Canned Chickpeas 🌱 | 1 can (15 oz) | Drained and rinsed |
| Lentils 🌾 | 1 cup (dry) | Green or brown, rinsed well |
| Sweet Potatoes 🍠 | 2 medium | Peeled and cubed |
| Spinach Leaves 🌱 | 5 oz | Fresh or frozen, chopped |
| Creamy Tomato Paste 🍅 | 2 tbsp | For depth of flavor |
| Olive Oil 🫒 | ½ cup | Extra-virgin for richness |
| Dried Thyme 🌿 | 1 tsp | Or 1 tbsp fresh thyme |
| Ground Cumin 🌶️ | 1 tsp | Toasted for deeper flavor |
| Salt 🧂 | 2 tsp | Diamond Crystal preferred |
| Black Pepper 🌶️ | 1 tsp | Freshly ground preferred |
The base ingredients here are all about maximizing flavor while minimizing prep. San Marzano canned tomatoes at Trader Joe's or Whole Foods deliver that perfect balance of sweetness and acidity—don't skimp on this. For the coconut milk, full-fat is non-negotiable if you want that creamy texture in your soups. I always grab the Thai Kitchen brand because it's affordable and reliable, but any full-fat canned coconut milk works. The vegetable broth? Homemade is ideal, but even the basic low-sodium store-bought stuff elevates everything. Look for organic lentils and chickpeas if you can—they hold up better during storage and reheating.
No San Marzano tomatoes? Any high-quality canned tomatoes work—just taste and adjust seasoning. Swapping coconut milk? Heavy cream or cashew cream gives a similar richness, though the flavor profile changes slightly. Short on spinach? Kale or Swiss chard work beautifully—just chop them finely. The tomato paste can be skipped entirely if you're not a fan, but trust me, it adds that umami depth that makes these soups taste like you slaved over them. For the spices, toast your cumin seeds in a dry pan for 30 seconds before grinding if you want to take it to the next level—game-changer for flavor.
Prep everything in advance and store components separately for maximum freshness. The raw vegetables keep for 5 days in the fridge, while cooked components last 4-5 days when refrigerated. For longer storage, freeze cooked soups in portion-sized containers for up to 3 months. The coconut milk and broth can be pre-mixed and stored separately, then combined when assembling each day's soup. I always make double the tomato paste mixture and freeze half—saves time later in the week.
Why You'll Love This Recipe
- No-Chop Nightmare: I swear, I’ve made this soup after a 12-hour shift—just toss in pre-chopped onions, carrots, and celery (or even frozen veggies) straight from the bag. The garlic and tomatoes handle all the flavor work while I stir for five minutes.
- Tomato-Garlic Magic: That canned diced tomato base? It’s the secret weapon—sweet, tangy, and packed with umami. Sauté the garlic until it’s just golden (not burnt, trust me), and suddenly you’ve got depth without extra effort. The onions caramelize while you’re making toast.
- Meal-Prep MVP: This soup tastes better the next day (yes, really). I make a double batch on Sundays, freeze half, and reheat portions all week—whether it’s a lazy Tuesday or when my kid’s soccer team shows up starving. Add beans or greens later to switch it up.
- Pantry Stash Hero: Onions, carrots, celery, garlic, and tomatoes? You’re looking at a $5 recipe that feeds four. I’ve used this to turn a "what’s for dinner?" panic into a filling meal when my wallet’s tight. Bonus: the veggies soften perfectly, so no one picks out the "mushy bits."
Step-by-step instructions for a versatile 7-Day pantry soup
This hearty soup builds flavor over time while requiring minimal daily effort—perfect for busy weeks.
Sauté the Vegetable Base
Heat the 0.5 cup olive oil in a large Dutch oven over medium heat. Add the 2 whole yellow onions, 1.5 lb carrots, and 4 whole celery stalks, cooking for 8-10 minutes until the vegetables soften and the onions turn translucent. Here's the thing—don't rush this step. You want the vegetables to develop a gentle sweetness and release their natural juices before adding anything else.
Next, stir in the 12 cloves garlic cloves and cook for 30 seconds until fragrant. Add the 2 tbsp creamy tomato paste and mix well to distribute evenly. This creates a rich, flavorful foundation that will carry through all seven days. The paste should dissolve completely into the oil and vegetables, forming a thick, glossy base.
Build the Flavor Layers
Pour in the 2 cans (14.5 oz each) canned diced tomatoes and stir to combine with the vegetable mixture. Add the 6 cups vegetable broth, scraping the bottom of the pot to incorporate any browned bits. This step is where the magic happens—those browned bits pack serious flavor. Bring the mixture to a gentle boil, then reduce heat to low and let it simmer for 20 minutes to develop depth.
Add the 1 tsp dried thyme, 1 tsp ground cumin, 2 tsp salt, and 1 tsp black pepper, stirring well to distribute the spices evenly. Taste the broth now—it should be rich and aromatic, with a balance of sweetness from the tomatoes and earthiness from the spices. If it needs more salt, adjust now while the flavors are still developing.
Incorporate the Hearty Proteins and Potatoes
Add the 1 cup (dry) lentils, 1 can (15 oz) canned chickpeas, and 2 medium sweet potatoes (cubed) to the pot. Stir gently to combine, ensuring the sweet potatoes are fully submerged in the broth. Bring the mixture back to a gentle simmer and cook for 25-30 minutes, or until the lentils are tender and the sweet potatoes are easily pierced with a fork. The soup should have a thick, stew-like consistency by this point.
Here's the trick—don't overcrowd the pot. If the soup looks too thick, add a little more broth to maintain the proper texture. The lentils and chickpeas will expand as they cook, so give them room to absorb the flavors without steaming in their own juices.
Finish with Creamy Coconut and Fresh Greens
Reduce the heat to low and stir in the 1 can (13.5 oz) coconut milk, mixing until smooth and creamy. Add the 5 oz spinach leaves and cook for an additional 5 minutes, just until the spinach wilts completely. The coconut milk adds a luxurious richness that balances the earthy flavors of the lentils and sweet potatoes. Taste again and adjust seasoning if needed—this is your final chance to perfect the balance.
Let the soup sit off the heat for 10 minutes before serving. This resting period allows the flavors to meld together, creating a cohesive and deeply satisfying dish. The soup will thicken slightly as it cools, so you can easily reheat portions throughout the week without worrying about it becoming too watery.
Portion and Store for the Week
Ladle the soup into 4 airtight containers, ensuring each portion has an even distribution of vegetables, lentils, chickpeas, and sweet potatoes. The soup will keep well in the refrigerator for up to 7 days, with flavors actually improving as they develop over time. Label the containers with the date and reheat in the microwave or on the stovetop until steaming hot before serving.
This soup is designed to get better with each passing day. The lentils and chickpeas will soften further, the flavors will deepen, and the coconut milk will create an even creamier texture. It's the ultimate pantry-to-pot solution—minimal effort today, maximum satisfaction all week long.
Pro Tips For Making 7 Day Soup
- SWEAT THE VEGETABLES FIRST: I learned this the hard way—skipping the initial sweat with onions, carrots, and celery means your soup will taste raw no matter how long you simmer. Cook them over medium-high heat until the onions turn translucent and the carrots soften (about 8-10 minutes). This builds flavor that won’t disappear after a week.
- CHOP GARLIC SLIGHTLY LARGER: Tiny minced garlic burns before it infuses. For this soup, cut whole cloves in half or crush them lightly—just enough to release their aroma without turning bitter. You’ll taste it better, and it’ll last longer in the fridge.
- DRAIN TOMATO JUICE: Canned diced tomatoes pack liquid that dilutes flavor over seven days. Drain them first, then crush the solids by hand (or use a fork) to keep the soup rich and concentrated. Trust me, your future self will notice the difference.
- SIMMER LOW AND LONG: This isn’t a quick dinner—it’s a week-long project. After adding tomatoes, reduce heat to a bare simmer (tiny bubbles, just enough to keep it warm). Too much heat breaks down the veggies faster, and you’ll end up with mushy soup by day three.
Troubleshooting great 7 day soup
Mushy Vegetables
Overcooking carrots and celery is the #1 cause of soggy texture. To prevent this, cut them into even ½-inch pieces and add them to the pot 5 minutes before the end of cooking. I always reserve ½ cup broth before adding the coconut milk—pour this over the veggies in the last 5 minutes to restore their crisp-tender bite. 🥕
Flat Flavor Development
If your soup tastes bland after reheating, it’s likely missing the Maillard reaction boost from browning. Always sear your onions until they’re deep golden brown (not just translucent) before adding tomatoes. For extra depth, toast the cumin seeds in a dry pan for 30 seconds until fragrant before grinding them. This simple step adds layers of complexity that store-bought spices can’t match.
Separation Issues
Coconut milk and broth can separate when reheated, especially if stored too long. The fix? Stir in 1 tsp cornstarch mixed with 2 tbsp water when reheating—this acts as a natural thickener. For future batches, add ¼ cup plain Greek yogurt when serving to stabilize the texture. I keep a small jar of this "emergency fix" in my fridge for exactly this purpose. 🥥
Grainy Lentils
If your lentils turn mushy or grainy, it’s usually from either undercooking or overcrowding. For perfect texture, cook lentils in 3x their volume of broth (not the full pot) for 20-25 minutes before adding to the soup. Pro tip: Rinse canned chickpeas thoroughly to remove excess sodium, which can make them turn mushy when reheated. I also add them 10 minutes before serving to maintain their texture.
Broth Too Watery
When reheated soup tastes diluted, it’s because the starches broke down during storage. Reduce the broth by 25% upfront—simmer uncovered for 10-15 minutes before adding the coconut milk. For future batches, add 1 mashed potato or 2 tbsp arrowroot powder when reheating to restore body. This is my go-to fix when I’ve forgotten to reduce the broth initially. 💧
Spinach Disappears
Fresh spinach wilts completely when added too early. The solution? Stir in the spinach only in the last 2 minutes of cooking—this keeps it vibrant and visible in each bowl. For extra color, add 1 tbsp nutritional yeast when serving (it adds a cheesy flavor without dairy). I also like to reserve some spinach for garnishing—just wilt it separately and sprinkle on top right before serving. 🌱
Nutrition facts
Frequently asked questions
Can I make this 7-day soup plan vegetarian?
This recipe is already vegetarian-friendly, but you can easily customize it further. Replace the chickpeas with extra lentils or add 1 cup white beans for extra protein. For a vegan version, use vegetable broth and ensure your coconut milk is labeled vegan. The coconut milk adds richness that makes it satisfying without meat.
How do I keep the soup from getting watery when reheating?
Prevent watery soup by reducing the broth before adding coconut milk—simmer uncovered for 10-15 minutes to thicken it first. For reheating, stir in 1 tsp cornstarch mixed with 2 tbsp water to restore body. I also recommend storing soups in portion-sized containers—this helps maintain texture better than one large batch.
What if I don’t have coconut milk?
No problem! Substitute with ½ cup heavy cream or cashew cream for richness. For a dairy-free option, use ½ cup Greek yogurt mixed with ¼ cup broth. The coconut milk adds a unique flavor, but these alternatives work well for a different taste profile. Always adjust seasoning after adding substitutes.
Can I freeze any of these soups for later?
Yes, but freeze only the broth-based components (without coconut milk) for up to 3 months. The coconut milk can separate when frozen. For best results, freeze individual portions in airtight containers and thaw overnight in the fridge. Reheat gently on the stove for the best texture.
How do I adjust flavors for different dietary needs?
For low-sodium diets, use low-sodium broth and reduce added salt to 1 tsp. For gluten-free needs, ensure all spices and broth are certified gluten-free. To make it spicier, add ½ tsp cayenne or 1 tsp smoked paprika** when reheating. The base recipe is flexible enough to accommodate most dietary restrictions with simple swaps.