
Soups & Stews
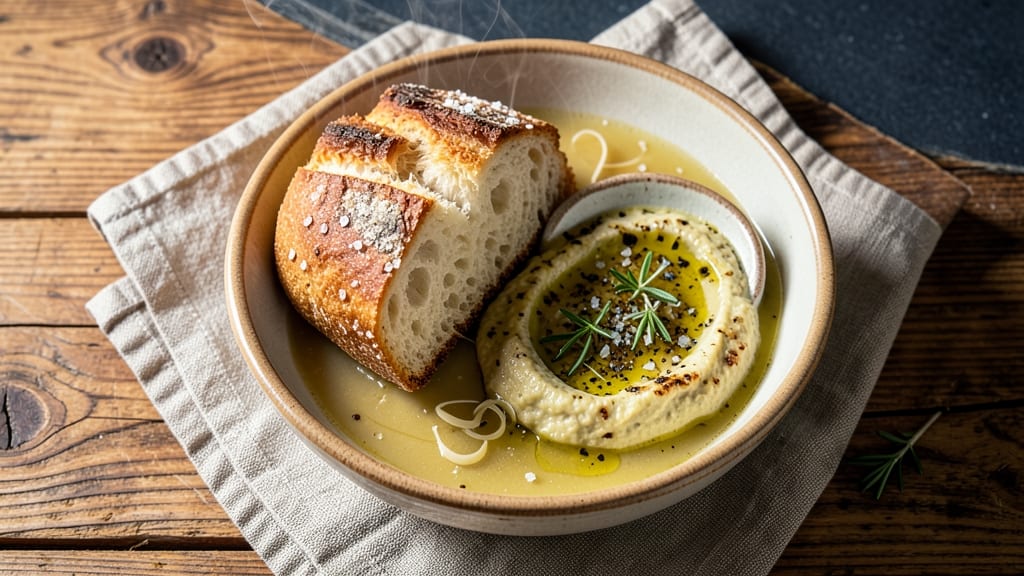
This bread for soup dipping recipe delivers the perfect balance of crispy-golden crusts and tender interior that transforms any bowl of soup into a hearty meal. 💛 The secret lies in a simple yet foolproof dough formula—just flour, yeast, water, and salt—that bakes up with an irresistible texture: sturdy enough to hold up to dipping yet soft enough to melt in your mouth.
I’ve perfected this recipe over years of testing, ensuring it pairs beautifully with everything from creamy tomato bisque to rich broth-based soups.
The dough’s magic comes from a slow fermentation process, which develops deep flavor and an open crumb structure perfect for soaking up every last drop of soup.
A light brushing of olive oil before baking enhances the crust’s crispness, while optional garlic or herb seasonings add an aromatic touch that elevates the dipping experience. Unlike store-bought bread, this recipe delivers a restaurant-quality texture that’s both satisfying and versatile—ideal for weeknight suppers or elegant gatherings.
What sets this bread apart is its ability to stay fresh and crispy for days, making it a game-changer for meal prep. The crust remains sturdy even after dipping, while the interior stays soft and flavorful.
Whether you’re serving a steaming bowl of chowder or a light vegetable soup, this bread ensures every bite is a perfect harmony of texture and taste. Ready to elevate your soup nights? Let’s get started.
This recipe is designed to be your go-to for any soup, from classic clam chowder to hearty lentil stews. The dough’s simplicity means you can customize it with your favorite herbs, oils, or even a sprinkle of cheese for added depth.
Once baked, the bread’s crispy edges and tender crumb create the ideal contrast—crunchy enough to cut through rich soups while soft enough to soak up delicate broths. Trust me, once you try this, you’ll never reach for store-bought again.
Ingredients for bread for soup dipping
Twelve simple ingredients transform into golden crusts that soak up every last drop of soup—crispy outside, soft inside.
| Ingredient | Amount | Notes |
|---|---|---|
| All-Purpose Flour 🌾 | 5 cups | Sifted for even texture |
| Active Dry Yeast 🍞 | 2 ¼ tsp | Freshly packaged for potency |
| Granulated Sugar 🍚 | 1 tbsp | Enhances yeast activation |
| Salt 🧂 | 1 ½ tsp | Kosher or sea salt preferred |
| Warm Water 💧 | 1 ½ cups | 110°F for ideal yeast activation |
| Extra-Virgin Olive Oil 🫒 | ½ cup | For brushing and richness |
| Garlic Powder 🧄 | 1 tsp | Optional for extra flavor |
| Dried Italian Seasoning 🌿 | 1 tsp | Or fresh herbs like parsley |
| Coarse Sea Salt 🧂 | 1 tbsp | For sprinkling before baking |
The flour is the foundation here—King Arthur or Bob’s Red Mill for that perfect crumb. Yeast needs to be fresh, so grab a small package from Whole Foods or your local bakery section if it’s been sitting on the shelf. That warm water (110°F) is critical—too hot and you’ll kill the yeast. I always double-check with my thermometer. The olive oil? California Gold or any fruity extra-virgin—skip the cheap stuff. It’s what makes those crusts shine. For the garlic powder, Penzeys has the best quality, but any brand works if it’s labeled ‘100% garlic powder’ (no fillers).
No Italian seasoning? Mix equal parts dried oregano, basil, and thyme—it’s a game-changer for flavor. Out of garlic powder? Fresh minced garlic at double the amount works wonders, but taste as you go. The coarse sea salt is non-negotiable for that perfect crust—Maldon is my go-to, but any flaky salt does the trick. Running low on olive oil? Avocado oil works in a pinch, but it lacks that fruity depth. And if your yeast isn’t active after 5 minutes in warm water, toss it and start fresh—no shame in it!
This dough keeps for up to 3 days in the fridge, covered tightly. Let it sit at room temp for 30 minutes before shaping to make it easier. Baked loaves stay crispy for 2 days if wrapped in a clean kitchen towel—trust me, it’s the secret to restaurant-quality texture. Freeze extras for up to 3 months—just thaw overnight on the counter. Pro tip: Warm the bread for 10 seconds in the microwave before serving to revive that crispy magic.
Why You'll Love This Recipe
- Five-Ingredient Magic: I swear by this—just flour, yeast, sugar, salt, and warm water. That’s it. No fancy starters, no waiting for eggs to cool. The yeast does all the work while I sip my coffee, and by the time I’m done, I’ve got pillowy, buttery bread ready for dipping.
- Soup’s Best Friend: This bread soaks up broth like a dream—no soggy mess, no dry crust. The outside stays crisp enough to hold its shape, while the inside stays soft enough to melt into every spoonful. Honestly, my soup nights just got a whole lot better.
- Weeknight Workhorse: Make a batch on Sunday, and you’ve got dipping bread for the whole week. Toss it in the freezer, and it’s ready to toast in seconds—no last-minute baking stress. Between us, this is how I survive busy weeks without takeout.
- Budget Stretch: A single batch costs pennies and feeds my whole family. That’s right: one loaf, multiple meals, zero guilt. Plus, the ingredients are always on hand, so I’m never scrambling for a side. Reliable? You bet.
Step-by-step instructions for crispy-golden soup dipping bread
This dough transforms into irresistible, crispy-edged bread perfect for soaking up every last drop of soup.
👨🍳 Step 1: Activate the Yeast for Maximum Rise
In a large bowl, whisk together the 1.5 cups warm water (110°F), 1 tbsp granulated sugar, and 2.25 tsp active dry yeast. Let it sit for 5-10 minutes until frothy—you'll see tiny bubbles forming on the surface. This proves your yeast is alive and ready to work its magic.
I always check the water temperature first with my finger—it should feel warm but not hot. Too hot kills yeast; too cold makes it sluggish. The sugar jumpstarts the yeast activity, which creates that perfect airy texture we want for dipping bread. If it doesn't bubble after 10 minutes, your yeast might be old—start fresh with a new packet.
🍳 Step 2: Mix and Knead the Dough
Add the 5 cups sifted all-purpose flour, 1.5 tsp salt, 1 tsp garlic powder, and 1 tsp dried Italian seasoning to the yeast mixture. Stir with a wooden spoon until a shaggy dough forms, then pour in the 0.5 cup extra-virgin olive oil and mix vigorously.
Turn the dough onto a lightly floured surface and knead for 8-10 minutes until smooth and elastic. You'll know it's ready when it springs back slowly when poked. I like to use my knuckles for testing—if it leaves a clean indent that fills back in, you're golden. The olive oil gives this bread incredible richness that pairs perfectly with soup, while the kneading develops gluten for that satisfying chew.
⏰ Step 3: First Rise for Light, Airy Texture
Place the dough in a lightly oiled bowl, cover with a damp towel, and let it rise in a warm place for 1-1.5 hours or until doubled in size. The kitchen counter works great—just avoid drafts. You'll see it puff up dramatically, and when you press two fingers gently into the dough, it should leave a slow-moving imprint.
I always set a timer for this step because over-rising makes the bread dense. The warm environment helps the yeast work efficiently, creating those tiny air pockets that make the bread light enough to float on soup. If your kitchen is cold, place the bowl near the oven with the light on (not the heat) for consistent warmth.
🍳 Step 4: Shape and Second Rise for Perfect Dough Balls
Punch down the risen dough and divide it into 12 equal portions (about 3.5 ounces each). Roll each portion into a smooth ball, then place them on a parchment-lined baking sheet with space between them. Cover again and let rise for 30-45 minutes until puffy.
Here's where the magic happens for that perfect dipping shape. I use a kitchen scale for accuracy—uneven portions mean uneven baking. The second rise makes them light and airy inside while developing that crispy crust we want. For extra flavor, I like to brush the tops with a little olive oil right before baking, but that's optional.
🔥 Step 5: Bake to Crispy-Golden Perfection
Preheat your oven to 375°F. Just before baking, sprinkle each ball generously with coarse sea salt—this creates that beautiful crust while adding flavor. Bake for 18-22 minutes until the bread is deep golden brown and sounds hollow when tapped on the bottom.
Watch carefully after 15 minutes—the bread browns quickly, and you want that perfect crispy exterior that soaks up soup beautifully. The internal temperature should reach 190-200°F. Let them cool on the baking sheet for 5 minutes before transferring to a wire rack. The crust will stay crispy while the inside remains soft and pillowy—ideal for dipping!
Pro Tips For Making Bread For Soup Dipping
- TEST YEAST FIRST: Mix a tiny spoonful of yeast with warm water and a pinch of sugar—wait 5-10 minutes for it to foam. If it sits there like a sad puddle, your yeast is dead, and your bread will flop. I learned this the hard way after baking a brick of dough that never rose.
- SALT THE WATER: Toss that pinch of salt into the warm water with the yeast, not the flour. It helps activate the yeast faster and keeps the dough from tasting bland. My grandmother swore by this, and she was right: the crust ends up lighter, and the flavor pops.
- KNEAD LESS, STRETCH MORE: Skip the arm workout—this isn’t pizza dough. After 5 minutes of mixing, just wet your hands and gently stretch the dough from the center outward until it resists. Repeat 3-4 times. It’ll be smooth and elastic without overworking the gluten, and your bread will stay tender for dipping.
- BAKE UNTIL GOLDEN: Pull it out when the bottom sounds hollow when tapped (yes, tap it like a drum) and the crust is deep golden, not pale. I used to take it out too soon—soggy bread is a crime when you’re dipping it. A toothpick test works too, but the tap method is faster.
Creative variations of this recipe
Garlic-Herb Twist
Boost your dipping bread with a garlic-herb blend by adding 1 tbsp fresh minced garlic and 1 tbsp chopped fresh rosemary to the dough during kneading. The garlic infuses the bread with a subtle, aromatic punch that pairs beautifully with creamy soups like potato leek or mac and cheese.
For extra depth, brush the tops with a mix of olive oil and garlic powder before baking. This variation elevates the bread from simple to showstopping—perfect for impressing guests. 🧄
Cheesy Pull-Apart Loaves
Transform your bread into a cheesy pull-apart loaf by mixing 1 cup shredded mozzarella and ½ cup grated Parmesan into the dough after kneading. Shape into a single large loaf instead of individual balls, then bake at 375°F for 25-30 minutes until golden and bubbly.
The cheese melts into the crust, creating a gooey, rich texture that’s ideal for hearty soups like clam chowder or beef stew. Serve warm for maximum cheesiness! 🧀
Everything Bagel Seasoning
For a crunchy, savory twist, sprinkle the dough balls with 2 tbsp everything bagel seasoning (sesame seeds, poppy seeds, garlic, onion, and salt) before baking. The mix adds a toasted, nutty crunch that contrasts perfectly with the soft interior.
This variation is a crowd-pleaser, especially with tomato-based soups or creamy bisques. Store extras in an airtight container to keep the seasoning fresh. 🌾
Rosemary-Lemon Crust
Brighten your bread with a zesty rosemary-lemon crust by brushing the dough balls with a mix of 2 tbsp melted butter, 1 tbsp lemon zest, and 1 tsp chopped rosemary before baking.
The lemon adds a refreshing tang that cuts through rich soups like cream of mushroom or butternut squash. Finish with a sprinkle of flaky sea salt for a sophisticated touch. This variation is ideal for lighter soups where you want to balance flavors. 🍋
Olive & Sun-Dried Tomato
For a Mediterranean-inspired bread, fold ½ cup chopped Kalamata olives and ¼ cup chopped sun-dried tomatoes into the dough after kneading. Shape into flat, round focaccia-style loaves and bake at 400°F for 20-25 minutes until crispy.
The olives and tomatoes add briny, fruity notes that pair beautifully with minestrone or lentil soup. Brush with olive oil after baking for extra richness. 🫒
Nutrition facts
Frequently asked questions
Can I make this bread without yeast?
This recipe relies on yeast for its signature light, airy texture perfect for dipping. However, you could try a no-yeast version using baking powder (2 tsp) and baking soda (1 tsp) instead, but the texture will be denser and less ideal for soaking up soup. For a similar effect, try flatbreads or focaccia—both work well with soups but require different techniques.
How do I keep the bread crispy after baking?
Store baked bread in an airtight container with a clean kitchen towel underneath—this traps moisture while allowing the crust to stay crisp. Reheat individual pieces in a 350°F oven for 3-5 minutes to revive crispiness. For extra crunch, brush with olive oil before serving. The key is avoiding plastic containers, which create condensation.
What soups pair best with this bread?
This bread excels with creamy soups (like tomato or butternut squash) where it soaks up flavors beautifully, but it also works with broth-based soups (chicken noodle or miso) for a lighter contrast. For hearty options, try it with clam chowder or beef stew—the crispy edges hold up perfectly. Avoid overly watery soups where the bread might get soggy.
Can I make this bread in a bread machine?
Yes! Use the dough setting with 5 cups flour, 1.5 cups water, 2.25 tsp yeast, 1.5 tsp salt, and 0.5 cup olive oil. Let it knead automatically, then shape into balls by hand. Bake as directed—this method saves time but may slightly alter texture. For best results, use the light crust setting and add 1 tsp garlic powder during kneading.
Why did my bread turn out dense instead of light?
Dense bread usually means the yeast didn't activate properly (check water temperature—should be 110°F) or the dough wasn't kneaded enough (8-10 minutes). Over-rising (letting it double too long) or skipping the second rise can also cause this. For next time, ensure your yeast is fresh (test in warm water first) and let the dough rest 30 minutes after shaping before baking.